Wednesday, October 31, 2012

How To Make Curry - What Not To Do!

photo courtesy of Wiki Commons

Ok, I tried my hand at homemade curry for the first time tonight.  I'll be honest, it did not turn out how I'd hoped.  I definitely need more practice but tonight's effort did not end in failure, thank goodness because it would have been such a waste of ingredients!

I reviewed 3 different YouTube videos on making curry paste and I combined tips from all three and tips from the web.  I was concerned how I would thicken my curry paste (without using flour or corn starch) and remembered the Tahini I had in the fridge from a homemade hummus recipe I tried a few months back.  I googled Tahini in curry paste and it seemed like a viable option.

However, I find that it took over in flavor and I was not pleased about that. Now it's very possible that I used too much. That was a result of me listening to head and not my gut.  My head (and perhaps ego) ruled throughout making this dish and I gained valuable insight from this experience. So I'm going to do some things differently next time! And I can't wait!


The Learning Curve

Getting too far ahead of myself, I taste tested the pre-paste mixture and thought it wasn't spicy or flavorful enough so I kept adding more spice thinking the Tahini would mellow it enough to leave it just right. I didn't measure the Tahini. I pretty much just added what I thought would work well (with no prior experience/knowledge). Well, what I got was a very bland initial taste and then a spicy flavor as it goes down your throat.  It was a great learning experience and I honestly feel that the learning curve here is very high.

Another mistake I made was not following basic principles of cooking and that is "mise en place" (French for "put in place").  This just means get everything ready before hand. DOH! I know better but still haven't quite broken myself of some bad habits.  It's best practice to chop, dice, cut everything first, portion out ingredients (so you can add them in a timely fashion), etc to create the best result.

I also think I may have used too much oil. Again, I didn't measure and I kept adding as a I went along (as a result of failing to chop the garlic prior and finding a lot of the oil had already been soaked up by the onions so I added more - perhaps not a good idea).  I used a canola/olive oil blend. I personally don't like to use canola oil but I didn't want to use the organic extra virgin olive that I have (better for dressings, not a great choice for cooking) and the only other oils I have are sesame and coconut so I was quite limited.

I didn't have any tomatoes or tomato paste on hand and assumed this would turn out well without it.  Next time, I will make sure to include tomato and perhaps ghee. (Watch the YouTube videos below to learn the recipe.)

This is the curry on simmer.  I succeeded at appearance and nutrition but flavor needs work.
I'm not gonna go in to great detail about my method but I want to share with you the videos that I watched. Enjoy!

Check out these videos on making curry:


Saturday, October 27, 2012

Pumpkin Cookies Recipe - Nutritious and Organic!

Hi Everyone! I hope your fall season has been full of fun and laughter! Here is a little pumpkin cookie recipe I tried out the other day that I would like to share with you.

Me Versus The Recipe - Explaining The Substitution Choices

     As you may have guessed by now, I love to make nutritious and healthier substitutions for certain ingredients like white/wheat flour, sugar, and heavily processed foods. I found a pumpkin cookie recipe on the back of a bag of millet flour by Bob's Red Mill (based out of Oregon and has a wide variety of gluten free, whole grain organic flours Bobs Red Mill 19493 Organic Buckwheat Flour (Google Affiliate Ad)).  I elected to substitute buckwheat flour (check out my blog post on the health benefits of buckwheat flour!) because that's my flour of choice at this time.  I picked up some fresh pumpkin (in season in Alabama) and some Simply Organic nutmeg Simply Organic 28703 Organic Coriander (Google Affiliate Ad) and ginger (Simply Organic 28639 Organic Ginger (Google Affiliate Ad).  I figured those would be items I could use up pretty easily).  I already had everything else required for the most part.  I looked up some other pumpkin cookie recipes and studied those for a minute before I got to work.


     The recipe called for canola but I personally am against this oil.  I used Spectrum Organic coconut oil instead (which I believe added to the sweetness of the cookies!). This is my go-to cooking oil for items where the mild coconut flavor imparted won't affect the overall flavor of this dish.  As a matter of fact, many proponents of coconut oil love the results achieved from using this wonderful oil.  I love the results along with the knowledge that I'm using an oil that is so very nutritious and essential for good health. (Please click the link for an article on the many wonderful uses and benefits of coconut oil that I simply just don't have the means to compile for you! However, be on the lookout for a write up in The Holistic Health Diva's blog!)

Here is a link to a brand that I myself would be interested in and purchasing from Sam's Club (for all those bulk shopping Divas out there!)


     Also, it called for 1.25 c of honey but I substituted about 0.75 c of organic agave nectar and some Stevia. I'd say I used about 1/8 c of Stevia.  Use Stevia sparingly.  Read the directions for baking with Stevia on the package and use your judgement. I don't like really sweet things so I use a little less.


     I used a small pumpkin and I cut it into chunks and steamed it in my rice cooker/steamer using the steaming basket that came with it.  It worked extremely well. The skin just peeled right off. Make sure to rinse the pumpkin well beforehand.  After it cooled, I mashed it up until it reached a smooth consistency (according to the recipe). I mixed the wet ingredients in with the pumpkin. Then I whisked together the dry ingredients and added to the wet little by little stirring them in well before adding more.  This creates a thick, pourable batter.

     I poured the batter on eco-friendly wax paper laid  atop of a cookie sheet, no greasing necessary.  I used a spatula to remove the cookies and was able to remove them rather easily. I didn't break a single cookie!

     All in all, it was pretty easy. I hope my background story helps make it an even easier feat for you aspiring and/or mature green home cook divas out there!

The Recipe

Dry Ingredients:

  • 2.5 c buckwheat flour (The recipe itself calls for 2 c of millet flour AND 0.5 c buckwheat, soy, or amaranth flour. I only used buckwheat and I was pleased with results.)
  • 3 tsp baking powder
  • 2 tsp cinnamon
  • 0.5 tsp sea salt
  • 0.5 tsp nutmeg
  • 0.25 tsp ginger
  • Raisins (optional) - I did not include 
  • 1 c chopped nuts (optional) - I did not include
Liquid Ingredients:  *see my substitutions above
  • 0.5 c canola oil *
  • 1.25 cups honey *
  • 2 eggs, beaten
  • 1 Tbsp molasses (optional) - I did not include
  • 1-2 tsp vanilla extract (optional) - I included
  • 1-1.5 c cooked mashed pumpkin
Preheat the oven to 425 degrees. Stir dry ingredients into the liquid ingredients.  Pour onto cookie sheet in medium size circles/ovals.  Bake 12-14 minutes.  

     Cookies will be soft and "cake like" Mine turned out very moist and sweet and I could only taste the Stevia slightly! I taste tested with a friend who said it needed more sugar until he found out there was NO sugar! Then he said it was great for a no sugar cookie! So there you go! The evidence concludes healthy can be very tasty too! And NOT taste diet-like!
Happy Fall Season, ya'll!

Thursday, October 25, 2012

How To Make Delicious Homemade Potato Salad!

     I recently made some vegetable stock and had some potato left over from it.  I decided to make one of my favorite dishes with it, potato salad.  Potato salad is a very simple dish and I always free hand it.  All you need to do is rinse, peel, and cut some potatoes into chunks (just enough for whomever will be eating and a little leftover. In other words, you don't need to boil the whole bag!)  and get those boiling and in a separate pot, boil some eggs (again, consider how many you are feeding and how much you wouldn't mind leftover.).   Once the potatoes are boiled (about 30-45 min should do, check for desired tenderness), drain and let cool. Do the same for the eggs. Once those have cooled, chop/mash to desired bite size chunks, mix together with *onion (optional), *mustard, *mayonnaise, *salt, *pepper, *vinegar.

*Do to taste*

     In the past, I used pickled relish and kosher dill pickles rather than vinegar but this time, I used only vinegar and added shredded cabbage and a little red onion. It was SO DELICIOUS!


*Just remember you can always add more but you can't necessarily take away so go easy on the mustard and vinegar.  Mix together and then do a taste test.  If it needs a little more tangy-ness, add a bit more vinegar and repeat.  This is key to getting the dish to turn out just right for you and the ones you are serving.  Following a recipe to the tee might not produce the desired flavors for you and your loved ones.  Remember, a recipe is a guide and the best thing you can do for yourself as a home cook is to learn how to think like a cook!  That's what a home cook DIVA does!*

Tip: Think in proportions, ratios, parts, etc.  
     When you read a recipe, gauge the differences in the measures for the different ingredients.  There's a reason for that and understanding those proportions and being able to visualize them in the bowl together will help you be able to successfully free hand dishes in the future.  This will help save time and make cooking ultimately more freeing and enjoyable! Measuring is great for consistency. For getting the same outcome each time.  Please keep this mind when being a diva in the kitchen!

     With that being said, I always balance the mustard against how much mayo and the mayo against how much potato.  I have a good visual expectation of what will do the trick. Try doing that. If you need to follow a recipe as a guide, then do so but please don't rely on the recipe every time for such a simple dish!!  


Instructions:
1. Rinse, peel, and cut some potatoes into chunks
2. Get those boiling  (about 30-45 min should do, check for desired tenderness)
3. In a separate pot, boil some eggs (I boil mine for a good 30 min)
4. Drain and let cool. 
5. Chop/mash to desired bite size chunks
6. Mix together with mustard, mayonnaise, salt, pepper, vinegar. 

Sunday, October 21, 2012

How To Make Soup Stock - It's Easy, I Promise!


     Tonight I finally made the vegetable stock that I've been posting about on Twitter last week.  Over the last 2-3 months, I've been stockpiling unused and uneaten parts of vegetables in the freezer for this sole purpose.


     Don't be fooled.  You can put whatever you want in to a stock.  Anything will work. I personally am trying to go vegetarian so beef and chicken stocks are out of the question but those can be made from the bones with anything else you would like to put in there.  You can boil fish bones and shells from shell fish to get a seafood flavor.  Be creative AND resourceful.  Use your judgment and have fun.  I personally value nutritional content over looks and taste (of course it has to taste decent).  So I'm happy with a healthy vegetable stock adding nutrients to soups and anything else cooked in the stock.

Ingredients:

kale and chard stems, potato, broccoli and cauliflower stalk, the insides of tomatoes scraped out, carrots, onion, fresh garlic, turmeric, bay leaves, Italian seasoning blend, sea salt and freshly ground pepper.
Directions:
Bring everything to a boil and then reduce to a simmer for about an hour.
At a boil
Finished product!
     If you are looking for a specific outcome, then you should follow a recipe to the tee and personally, I think there is nothing wrong with that goal.  That can be a fun and exciting challenge but not always practical.  This stock was created out of sheer resourcefulness and creativity/experimentation. ( Please note that there are certain stock "rules" per se out there that are signature of certain cuisines.)

      I've made vegetable stock once before for a vegan pasta sauce and found it worked very well so I'm confident this stock will work well for the soup I plan to make with it this week.  I intend to post a review of that dish as well.

*This post has been linked to Frugal Days, Sustainable WaysThe Home Acre Hop.,Tasty Traditions, and A Blossoming Life blog community.*

Saturday, October 20, 2012

A Simple, Yummy, Nutritious Pasta Dish with Salad!

       I picked up some organic, locally grown produce from the local health foods store today because I was craving some vegetables! I love to eat my vegetables raw in the form of salads, steamed, or sauteed with flavorful oils seasoned with aromatics.  I love to eat salads because they are a great way for me to eat all my favorite veggies in their most nutritious form all at one time.  Of course, it's the dressing that makes it so tasty (please see my blog on making our own salad dressings).
Veggies for the week!
       But sometimes a salad alone just doesn't cut it.  So an easy pairing is pasta.  I happened to have a little rice bran pasta  but it wasn't quite enough so I threw in a little buckwheat vermicelli that I also had (Buckwheat vermicelli is a Japanese style noodle (soba), Here is a link to a good brand. Keep in mind this company sells in bulk which can be very convenient and environmentally friendly! Eden Foods 008639 Soba 100 Percent Buckwheat Wheat Free (Google Affiliate Ad)).

       I drizzled olive oil and balsamic vinegar (ratio 3:1 oil to vinegar) and added seasonings to the pasta directly rather than in the dressing.  It was so flavorful and delicious.  I couldn't believe my taste buds! I used the same dressing for my salad too.

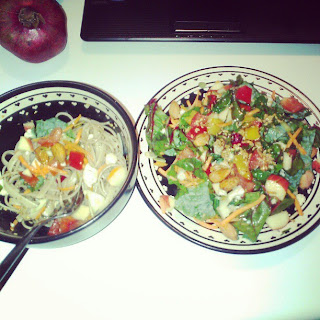
An Easy, Tasty Pasta with Salad!
(I threw in some salad fixings into the pasta too)
     The ingredients for my salad included kale, rainbow chard, tomatoes, red onion, cauliflower, fuji apple, red and yellow peppers, carrots, almonds, pumpkin seeds Pumpkorn 27872 Organic Original Pumpkin Seeds (Google Affiliate Ad), and flax seeds Spectrum Eseentials 40523 Organic Ground Essential Flax Seed (Google Affiliate Ad) (all organic and locally grown). I find that adding plant based proteins like nuts and seeds really add to the flavor of a salad so try it some time!

Stuff I used and highly recommend! I did not necessarily use these brands but I don't recommend a brand I"m not familiar with when i think it really makes a difference. Regarding seeds and nuts, I prefer raw and unsalted. Check them out and click on the links above to see their nutritional benefits! 
(Do remember this company sells some items in bulk)


Thursday, October 18, 2012

A Very Simple, Spicy Detox Recipe

     My detox specialty is pretty simple.  I read in a book by Dr. Walter Crinnion called Clean, Lean, and Green: Get Rid of the Toxins That Make You Fat Clean, Green, and Lean By Crinnion, Walter/ DAdamo, Peter (FRW) (Google Affiliate Ad)about foods and supplements that act as natural detoxifiers.    Foods like broccoli, brown rice, berries, various oils, spinach, etc.  

     So I steamed some brown rice  (more about detoxing with brown rice)  and added organic apple, broccoli (just happen to have this leftover and it needed to be eaten up asap), red pepper (chili) paste, and sesame oil.  You can substitute extra virgin olive oil,  flax seed oil, or rice bran oil also if the flavor mixtures suit you.  The go-to oils for me are extra virgin olive oil and sesame oil  and those taste great!  


     The point of detoxifying is to rid your body of toxins, not add to your toxic burden. So please try to go organic on the dirty dozen vegetables and cleansing conventional produce with a vinegar/water mixture to ensure the pesticides are removed.  

     Cook the rice (try soaking the rice overnight first), mix with the apples, broccoli, about 1 TBSP of oil, and about a teaspoon of red pepper paste and Voila!
The Diva's Detox Specialty is done!


Here is the The Diva's Detox Specialty.
Please click here for more photos of my cooking feats!


Here is my book review VLOG of Dr. Crinnion's Clean, Lean, and Green: Get rid of the toxins that are making you fat (and unhealthy).  Check it out!


Here is a 2 part video series I did on detoxing.  You should take a look!


Monday, October 15, 2012

8 Reasons To Eat Sesame Oil

         Back with a post about the health benefits of one of my favorite go-to ingredients as promised, sesame oil.

          I've been eating this oil since I was a youngster.  My Asian mother taught me to mix it with rice and other Asian condiments to make quick and easy meals for myself and my younger brother which was the inspiration behind Spicy Quinoa with Chia seeds and my detox concoction on my site (www.thegreenhomecookdiva.yolasite.com).

          But it wasn't until now that the health benefits of sesame oil (and sesame seeds too for that matter) actually mattered to me.  I am a firm believer in the consumption of healthy oils in our diets and sesame oil tops the list.  Unrefined (no solvent extraction, neutralization and bleaching) and cold pressed (expeller pressed at low temperatures) will provide the most nutrition but the popular form seems to be 'toasted.'  Toasted has a dark brown color and is commonly seen in Asian markets and the Asian sections of the grocery stores.   Just because they have been pressed under high temperatures does not mean they are no longer healthy, it just means that science says that heat tends to remove some of the nutrients.  The concern I have is the further processing.  This is when I start to question nutritional value.  But as it stands, the 'toasted' variety Toasted Sesame Oil (Google Affiliate Ad) is what I used in the recipe (the only variety I knew growing up and I like to think that I am quite healthy).

Making sesame oil at a Moran market in Seongnam, Gyeonggi Province, South Korea (photo courtesy of Wikipedia commons)

*Click here for a simple, tasty quinoa recipe that calls for a healthy dose of sesame oil*


Storing sesame oil.
Unrefined sesame oil contains 'sesamol,' a compound that allows the oil to keep for long periods of time without going rancid.  Despite this, it is still best practice to store the oil in dark colored bottles in cool places  to extend shelf life.

Different varieties.
Cold pressed sesame oil is pale yellow in color and has a different flavor than the toasted variety which is the choice of Asian cuisine.  


Smoke point.
Sesame oil does not have a smoke point high enough for deep frying so another oil is recommended (Even doctors recommend coconut oil which is a more stable oil that keeps well  - I like this organic, unrefined and non-bleached, non-GMO, pure extra virgin, cold pressed, hexane free EfaGold Coconut Oil - 16 fl oz (Google Affiliate Ad)). The smoke point of sesame oil sits nicely at 350 degrees Farrenheit/ 177 degrees Celsius, making it much better for sauteeing/pan-frying/stir-frying.  Here is an unrefined, organic bulk package of 6 x 8oz bottles by a company I like, Spectrum Naturals. Spectrum Naturals 19124 Organic Unrefined Toasted Sesame Oil (Google Affiliate Ad) (should that be your cup of tea).   Since it keeps well, buying this item in bulk will save you time and money. 


8 Health Benefits of Sesame Oil:

1. Regulates blood pressure (My blood pressure checks are always in a very normal range).

  • lowers sodium levels thereby acting as a natural diuretic and this helps to regulate blood pressure
2.  Lowers blood sugar 
  • high blood sugar leads to diabetes
3.  Promotes healthy skin
  • supports vitamin E and other skin benefiting antioxidants' functions in the body

Additional Benefits:

  4.  Anti-bacterial/anti-inflammatory
  • heals infections when applied topically
  • reduces joint pain when applied topically
  5.  Slows cancer growth
  • shown to slow the growth of skin cancer, melanoma when applied topically to cancerous area.
  6.  Protects against radiation induced DNA damage
  7.  Inhibits many forms of cancer, including leukemia, pancreatic, lung, and colon
  8.  Protects the liver from oxidative (free radicals) damage 

(Click here for an easy, tasty recipe that calls for healthy dose of sesame oil).
  

Friday, October 12, 2012

Spicy Quinoa with Chia Seeds!

          I came up with this little concoction out of bare necessity. I had recently taken a trip out of town and organic veggies and other items were just not in the budget for the week. So I cooked some quinoa in the rice cooker and added a little sesame oil, spicy red pepper paste (a staple of the Korean diet) and chia seeds. I ended up with a pleasantly surprising tasty little dish and not to mention quite healthy. It doesn't sound like much and well actually it isn't. But I just want to remind you that there's nothing wrong with a little creativity and fearlessness.

          Yes, you can cook quinoa in the rice cooker and it turns out fine. I've actually never cooked them any other way to be honest because it's just easy and convenient for me. It's your call. It can actually make a great substitute for rice in my opinion. But perhaps only for the hardcore health nuts. For those indifferent foodies out there, you might not agree that it can work for all rice dishes. Either side of the coin, there's no denying that quinoa is a great grain to eat in our diet.
          The only labor required here is putting 2 parts water and 1 part quinoa in a rice cooker (Here's a nice one: Oster 10-Cup Rice Cooker (Google Affiliate Ad) and pushing start. Once the True Roots 29580 Organic Quinoa - 3 x 12 oz. (Google Affiliate Ad) is cooked,


  1.                  Scoop about a 1.5c to 2c in a Two-Tone Bamboo Serverware         Individual  Bowl (Google Affiliate Ad)
  2.                  Drizzle about a TBSP of Toasted Sesame Oil (Google Affiliate Ad),
  3.                  Dollop about a tsp of red pepper paste (do to taste)
  4.                  Mix well. 
  5.                  Enjoy and reflect on how healthy you are eating! 


            Chia seeds Health from the Sun Raw Chia Seed 9.5 oz. 223279 (Google Affiliate Ad) and/or flax seeds Spectrum Eseentials 40524 Organic Dry Roasted Flax Seed (Google Affiliate Ad) are optional. I added those to this dish because it was an easy way to get those into my food. More blogs to come on the health benefits of these items soon so stay tuned. xoxo!

Wednesday, October 3, 2012

Yummy Sauteed Zuchinni!

Hi Everyone, I just wanted to share with you a little food tidbit! I had some zuchinni leftover from a zuchinni pasta I tried last week and it was needing to be eaten stat! So I decided to stir fry it to accompany my salad for dinner tonight and lunch tomorrow. So here's what I did: I heated coconut oil and garlic, sea salt, and pepper in a skillet. Then added some onion for a little additional flavor. Then added the zuchinni and sauteed it for a good 5-10 min or so. I wanted to make sure the flavor soaked in (I don't mind the soggy texture). And that's it! I ended up with a juicy/brothy liquid afterwards which would make this dish excellent served over rice! Note: Do a taste test. If you want more flavor, add more seasoning. If it's too strong, add more zuchinni. So don't just dump everything in there all at once. Use your judgement and alter according to taste. Just make sure to heat up the seasoning in the oil for a couple minutes! I recommend an organic oil with a high flash point (which is why I choose coconut), unrefined is always best because it means it has not undergone any heavy processing. Here is an excellent coconut oil that I highly recommend because of the manufacturing process that was used to produce it.  (For more about best practice oil manufacturing tips, please read my post on 8 benefits of sesame oil.)

Tuesday, October 2, 2012

Balsamic Vinaigrette Recipe

     Have you ever wondered why on earth anyone would just use the oil and vinegar bottle at the salad bar in the restaurant? Or why the restaurants even bother to offer those at all? Perhaps you just shrugged it off and thought to yourself, "Oh, must be for the pretentious types or for someone with allergies or something." I myself am guilty of those thoughts. Many times, I just passed over it, turning my nose up and reaching for the manufactured balsamic vinaigrette that I mistook for a healthier dressing. But I'd like to share with you why we should opt for the oil/vinegar both at the restaurant and at home.


      First, it's much better for our health. The manufactured dressings are full of preservatives and synthetic substances that are extremely bad for our health. Our liver has to break down these substances and really doesn't know what to do with them. They get recycled back into our blood stream and get stored in our fat cells. They basically become toxic in our body. They're useless to us and over time, can cause health problems. And don't be afraid of healthy oils like olive oil. We need good fats in our body to keep our bodies functioning well and olive oil provides those. The "fats" we need to stay away from are fats like hydrogenated oils, also known as "trans fat." Those are the fats you will find in dressings even if they are "low fat/low calorie." So by choosing oil and vinegar to "wet your veggies" and add flavor, you are making the best possible choice for your health.

      Second, it's much better for our environment. So much dressing and sauce gets wasted at the restaurant and that increases energy required to manufacture and ship more (only to get thrown away!). When we choose oil and vinegar, we are helping to lower the overall demand for these items. The same goes for at home too. By making oil and vinegar our dressing of choice, we decrease the amount of garbage thrown out and the amount of energy required to manufacture and ship those items to the grocery stores.

       Third, it's much better for our pocket book. We can get creative with dressings. We can use the ingredients on hand and create "masterpieces" if you will with very little cost to us. Just keep a good bottle of olive oil on hand and just about any flavor of vinegar will do! Throw in some seasonings or fresh/dried herbs from your garden and you've got a major hit on your hands! Your loved ones will thank you and you will have a little extra cash on hand to go see that new movie together!


Okay, now that you're convinced on why you should make your own dressings, it's time to get to work! Just check out this video and you will see there really is nothing to it!!


Ingredient list:

*This post has been linked to Frugal Days, Sustainable Ways  and A Blossoming Life blog community.*